If you have been following me for a while you know I kinda LOVE HATS! I just find they are the perfect accessory to every look and through the years I've collected many beautiful ones. It just gives your outfit just that little extra UMPH!
Let’s move on to how I used to store my hats… pretty simple… I would stack them on top of each other on top of my closet. I was usually putting on the same one all the time as that was the one on the top of the stack. Many times they would just all fall down and I would have to stack them all over again. Not the best way to store your hats I can tell you. There must be a better way to do this. And then came Pinterest! I had seen many beautiful pics of girls showing their amazing hat wall, so I decided to give it a try. Time for a little DIY hat organizer!
How to make your own fashionable hat organizer
There are a lot of other DIY wall hat organizers that leave tons of holes in the wall, this one requires just one. As I have a concrete wall drilling a lot of holes was just not an option for me. So I picked the wooden branch option. Not only is it a great way to store your hats with just one nail or little hole needed – but it also doubles as the cutest wall decor ever, and you know I’m all about those two-for-ones!
shop my look
Another perk about this DIY hat organizer is that it is super easy to do. It just took me an hour to fit and assemble and a short drive to the DIY center to get the materials and that's it. Ok, and a boyfriend to drill a new hole for me in the wall 😉
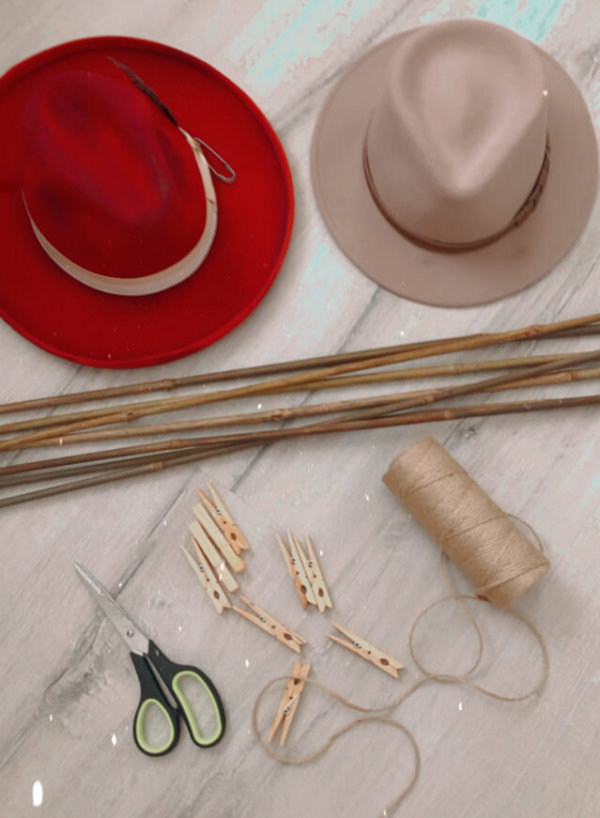
The total amount of money spent to create this masterpiece was… drum roll please… less than 9 Euro! The pack of wooden clothespins from the HEMA was 2,50 for a pack of 36 (I only used 7) and the sisal string was 3,60 for 30m. Wooden clothespins are very gentle and won't damage your hats! I used a bamboo stick of 1m long. It came in a pack of 7 for only 1,99. The plug and screw I already had including a handy boyfriend to make a new hole in the wall. If you have these things, you’re ready to rock.
What do you need
- Stick or wood doweling (Mine is a bamboo stick of 1m) A copper pipe is also a good way to go!
- String (I got the nude color of sisal for a more rustic look )
- Wooden clothespins
- Plug and screw depending on your wall. If you have regular walls a nail will work just the same!
- Scissors
How to assemble
- Measure where you want to hang the hat organizer, directly in the middle hammer the nail into the wall, or drill a little hole for the plug. Keep in mind the hats will need some room on each side.
- Cut a piece of string, wrap it around 3 times, and double knot one side, then the other. Make sure they create an even triangle and that they are even so that one side doesn’t have more weight than the other.
- Depending on how many strings you want coming off of the stick (I chose 3 but you can also work with 2 if you have less space) cut that many, I made mine different lengths for a more rustic feel. Check Pinterest for more inspiration.
- Again, wrap the string 3 times around and then double knot it. Space out evenly.
- Now it’s time to hang it on the wall.
- Then start hanging your hats on the string with your clothespins. Make sure you are dispersing the weight evenly on the outer sides or it will become lopsided! TIP: to prevent your clothespins to slide down tie them up to the string first and then attach the hat. Also: Put your most worn hats in the middle you don’t have to worry about your hat organizer becoming uneven.
That’s it- super simple and super affordable!! If you have any DIY hat organizer tips feel free to drop me a message below!
With love & light,
Yvon

